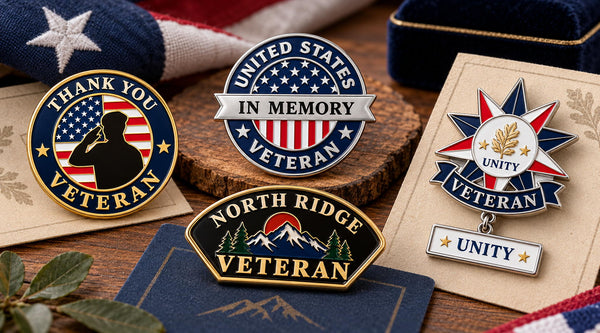
A veteran hat can carry one favorite emblem or several pins connected with service, a unit, a reunion, or another personal memory. A good arrangement gives each piece enough room to be seen and keeps the hat comfortable to wear.
Before fastening anything, look at the cap as a whole. Its embroidery, panel seams, brim, and fabric will help determine where a pin can sit. Planning the layout first also reduces unnecessary punctures from moving pins repeatedly.
Start With the Pin That Matters Most
Choose the piece you want people to notice first. It might identify your service background, a group you belong to, or an event you attended. Place that pin against the hat before deciding where any smaller pieces should go.
If the cap already has a large embroidered name or emblem, let that remain part of the arrangement. A pin does not need to cover the embroidery to belong on the same hat. A clear side panel may give it more room than the front.
Some people like a simple cap with one emblem. Others enjoy adding pins over time. Start with what feels meaningful to you, then judge the result by visibility, balance, and comfort.
Check the Cap From the Front and Inside
Turn the hat over before choosing the fastening position. A clear-looking area outside may have a thick seam, lining, or sweatband behind it. The backing needs space to sit without pressing against your head.
| Part of the cap | What to consider |
|---|---|
| Structured front panel | A clear area can support a readable focal pin, provided seams and embroidery leave enough room |
| Side panel | Useful for smaller pieces when the panel is not too curved or crowded |
| Mesh panel | Openings and flexible material can make some fastenings harder to position securely |
| Area near the sweatband | Check for pressure, rubbing, and space for the backing |
| Brim | Its stiff construction can make attachment awkward; check the actual brim before attempting to pierce it |
Hold the pin where you want it and look at both sides. If the backing would sit on a seam or against your forehead, try another position before making a hole.
Leave Space Above the Brim and Around Seams
Keep the entire pin outline visible above the brim. A design placed too low may become partly hidden or rest against the brim when the cap is worn.
Our Veteran Hat Pins design uses a low fan shape, with curved wording above a center artwork area and fixed VETERAN lettering along the lower edge. Its listed size is 1.375 inches, or 35 mm. Position it where the full shape can sit without bridging a thick seam or being pushed into a sharply curved panel.
A cap with wide embroidery may need a different position from a plain cap. Check the hat while wearing it, because the panel can change shape once it is on your head.
Give Several Pins Room to Be Read
For a collection, arrange the pieces before attaching them. Place the hat on a table and hold each pin against its proposed position, or make a quick sketch to compare the layout.
Try one of these approaches:
- One main pin on a clear front area, with a smaller event pin on the side.
- A few related pins along a side panel, spaced so their outlines do not touch.
- A familiar service-related pin kept in place, with one reunion pin changed for the occasion.
Avoid overlapping wording or placing a small pin where a larger one hides it. Leave room for the backing of each piece too; two pins that fit on the outside may still collide behind the fabric.
If the panel droops, the pins turn, or the hat feels heavy in one area, remove a piece or spread the arrangement across a more suitable area. You can keep the rest in a display rather than wearing the entire collection at once.
Choose the Attachment for the Actual Hat
Fabric thickness, panel flexibility, and space inside the hat all affect the attachment choice. Our fan-shaped design offers rubber clutches, metal butterfly backs, deluxe clutches, jewelry clutches, safety pins, and magnets.
A post-and-clutch option needs enough clearance behind the fabric. A magnetic attachment avoids piercing, but its hold depends on the material between its parts. Check the chosen option on the intended cap rather than assuming that an attachment used on a jacket will feel the same on a hat.
Pointed attachments can leave holes or marks. If the cap is a valuable keepsake, consider displaying the pin separately instead of making repeated placement changes.
Attach the Pin and Check the Fit
Take the hat off before fastening the pin. Support the panel rather than stretching it, and keep the wording upright as you secure the matching backing.
For a post-and-clutch pin:
- Check the post and backing for damage.
- Confirm the position from the outside and inside.
- Pass the post through the fabric while supporting the panel.
- Secure the backing according to its mechanism.
- Put the cap on and check for pressure, rubbing, tilting, or movement.
If the pin shifts or presses against your head, take the cap off and adjust it. Do not keep wearing it simply because the arrangement looks right from the front.

Keep Custom Wording and Artwork Simple
When ordering pins for a group of cap wearers, choose a short upper line and a clear center mark. On our fan-shaped design, the black field and VETERAN lettering remain in place while the upper wording and center artwork identify the group.
Gold and Silver finishes provide different outlines around that layout. If the artwork refers to a campaign, unit, or service ribbon, confirm that the reference is accurate for the recipients and use artwork the group is authorized to reproduce. Check the lettering and color sequence in the free digital proof.
For other layouts and recognition uses, see How to Choose Veteran Pins for Recognition, Memorials, and Events.
Check the Pins Between Uses
Remove the pins before cleaning the cap and follow the cap's care instructions. Store each pin with its matching backing where the post will not be bent or the face scratched.
Before the next outing, check the fastening and make sure the arrangement still sits comfortably. Recheck after travel or after moving a pin between hats, particularly if the new cap has different seams or fabric thickness.
Frequently Asked Questions
How do you put pins on hats?
Take the hat off, choose a clear panel, and check the space behind it for the backing. Support the fabric while attaching the pin, then put the hat on to check comfort and movement. Keep the pin clear of thick seams, the sweatband, and any area where the attachment presses against your head.
What are pins for hats called?
Small decorative or commemorative pieces worn on a cap are commonly called hat pins or cap pins. Veteran hat pins can include group emblems, service references, and event keepsakes. These compact pin-backed pieces differ from the long-shaft hatpins used to secure certain hats in the hair, so check the attachment when choosing one.